Poured Sugar CoralΒ 

Have you ever put the last decorative piece on your cake, when suddenly you were overcome with the urge to lean in and give it a lil kiss….you know, on account of it being so darn purdy?  

No????? 

Me neither!  I mean, that would just be weird……phhhshshshshsh 

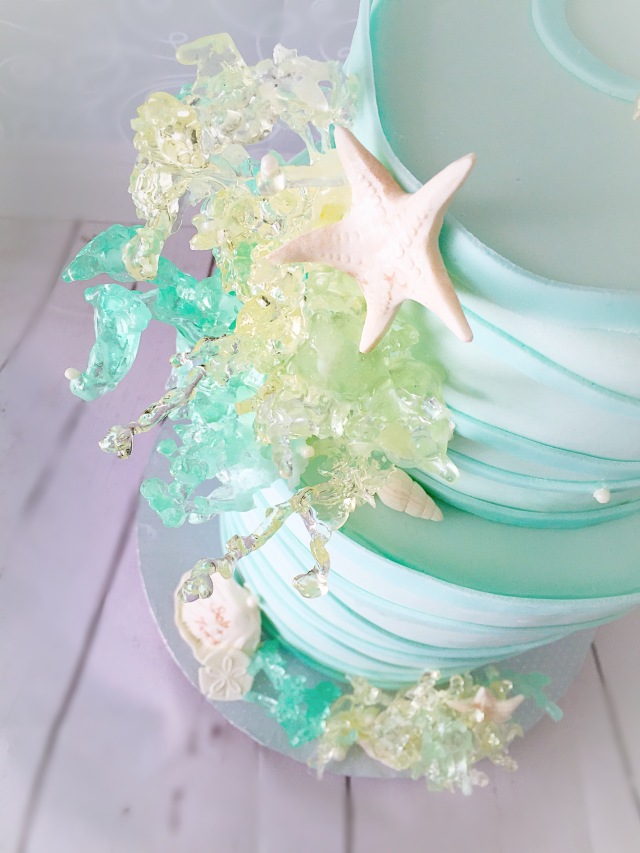
 cakes by sweetypants, poured sugar coral 
 Anyhoo….. πŸ™„ I might just think this cake is TOO…….DIE …….FOR.  It’s a matter of personal opinion. 

I have no doubt it has everything to do with the sugar coral that’s donning this beachy  themed beauty.  Sure the faint aquamarine color itself has a hand in taking my breath away……maybe the subtle nod to the ocean waves as well…….but I’m just gonna go ahead and give near full credit to the sparkly sugar crystal coral popping off the canvas, that makes my heart melt. 

Now I am no poured sugar expert here……For Realz! So lucky me because this technique can be done by, well……anyone!  

First of all, I used isomalt crystals.  (A sugar substitute)  You can buy them at your local cake supply store, or order them from Amazon. Duh! 

  Buying isomalt in crystal form is a wee bit cheaper than the “ready to melt” sticks available.  (And they are available in just about any color you could want)  They’re definitely not as cheap as working with actual granulated sugar, but I tend to wind up with 2nd degree burns and a huge mound of burnt sugar sadly,  more often than I wind up with perfectly cooked sugar.  (I should really take a class I suppose) So unless I’m feeling lucky, isomalt is the winner nearly every time.   Here’s whatcha need: 


  • Large pot
  • 2 cups (1lb) isomalt crystals
  • 3/4 cup water (distilled if you have it, the finished product will be much clearer)
  • Rubber spatula
  • Candy thermometer
  • Any silicone mold, sprayed with non stick spray for the leftovers
  • Small tub of ice 
  • A large bowl of cold water waiting in the sink πŸ˜‰


Combine your crystals and water.  Give it a light stir, just until moistened. 
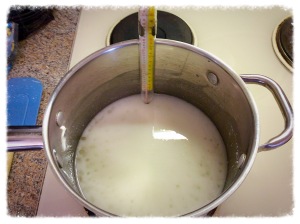
 
 Place it on the stove over high heat, and insert your candy thermometer.  Now wait……
Seriously…….that’s pretty much it.  

If you’ve worked with sugar before you know you have to brush down the sides and keep your eyes peeled almost the entire time, while you heart races, and you pace back and forth in front of the stove….. (Or is that just me once again?) 

With isomalt there’s really no need.  If it seems to be bubbling more in one spot, you might want to give it a stir, but otherwise just leave it be until it begins to boil.  


Once you’re boiling it won’t take long at all, as compared to sugar.  Keep your eye on the thermometer,  once it reaches 300 it’s going to go pretty quick.  We need it to cook until it reaches 340.  However, this means you want to remove it from the heat once it reaches around 330.  
Upon doing so, immediately place the bottom of your pot into your waiting bowl of cold water….just until it stops hissing.  Be careful here! 
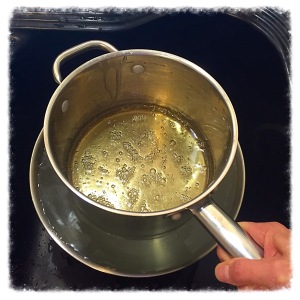
 
If you’re going to color your sugar, now is the time.  You can use the same gel colors that you use for fondant and frostings.  I would NOT use a water based coloring!   They will only ruin the consistency of your perfectly melted isomalt. 

At this point you can pour your isomalt into your waiting mold for use later, or you can use it immediately…..in a suitable sugar mold of your choice, or any other technique.  Part of the beauty of isomalt is that once you’ve completed the above steps and it has hardened, you can store it for later use.  All you need to do is melt your hardened pieces down in the micro for a minute and you’re ready to go ! 

But we are going to go ahead and make some gorgeous coral.  Woot! 

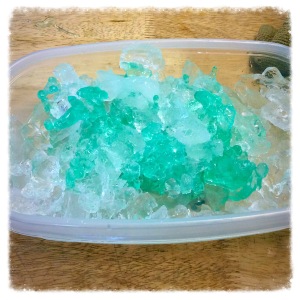
 All you need to do it pour your melted isomalt over your tub of ice (yeah….that’s pretty much it) πŸ˜€. 

 
Here….let me show you in color

 
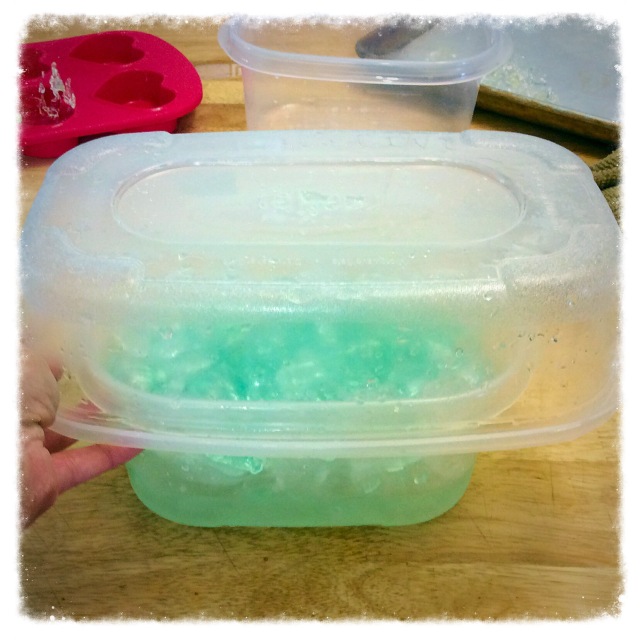
I found its easiest for me at this point to then flip the piece over into a slightly larger container.  GENTLY! 


The outcome at this point is up to you! I wanted large pieces of coral for my cake, so I let most of the ice just melt off so’s I didn’t damage anything, but you can also break them up into smaller pieces. 

 Just keep in mind, this really is as fragile as it looks so be careful!   Although, if you do happen to mess it up you can just remelt your isomalt in the microwave and do it again! 
   
Sigh…….so pretty.  Just leave them out to dry for a few hours.  


Now I just need to take a photography class so I can learn to capture just how beautiful these pieces really are! 

Have fun everyone! 😘


How To Make Butter From Heavy Whipping Cream

Recently I had several recipes that called for heavy whipping cream.  Yum! So naturally I bought way more than I needed……….what to do, what to do.  

There are several delicious recipes that call for whipping cream, but because I’m a baker I am always in need of butter, and let me tell ya…….it ain’t cheap! 

So short of buying a cow, I’ll do what I have to do to get it! πŸ˜€ 

It’s really very simple, all you need is heavy whipping cream, a mixer, and a jar. (The mixer is optional if you’d like to go total pioneer woman & rely on your arm strength alone).  

 One quart of whipping cream should yield near one pound of butter.  I only had about 3/4 of this carton left to work with, but I’ll take what I can get! 

You can do this one of two ways, either place the cream in a large jar and shake by hand from start to finish, or use a stand/hand mixer to do the bulk of it for you.   Shaking by hand is a great option if you have any pent up aggression that needs to come out…..πŸ˜‰

  
I chose the latter……..cuz I’m just in such a great mood

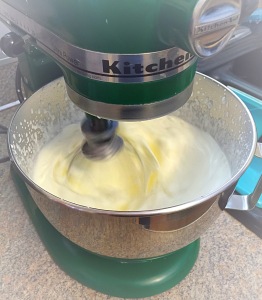
Just turn your mixer on high and let it do its thing.  

  
First the fluffy whipped cream stage……..


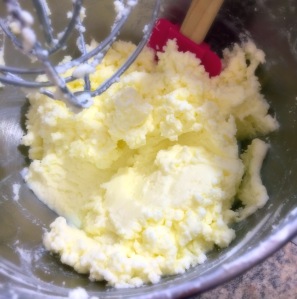
After a few minutes, maybe 5 or so, you’ll notice the look is becoming firmer and it also begins to yellow a bit. 

  
Then it will begin to harden and separate.  This is when I transfer to a jar.  I just wouldn’t feel right letting the mixer take all the credit! 

  
Shake shake Shake people! 

  
As the butter begins to firm up and come together, the buttermilk begins to separate more and more

  
Keep draining the buttermilk into a separate jar.  

 Now is when you would add in salt if desired.  (I use unsalted for baking) I would say 1/2 Tbs per quart.  You could also add in some herbs for extra flavor! 

The next step is to “wring out” your butter, just to get rid of any excess buttermilk hanging around.  You can quite literally run it under cold water and squeeze, or wring it until no more liquid is being released. (This process is pretty messy, but oh so effective)   Or, you can add cold water to a bowl along with the butter, and keep pressing it against the side with a spatula until the same result is achieved.   You can guess which method I go with, seeing as though I didn’t have a free hand to document with…….

You’ll be surprised how much fresh buttermilk you’ll get! Perfect for cakes!!!!  Or pancakes I suppose….😏. 

  
You’ll also be surprised at how condensed your final product becomes!  If you wanna be all fancy, you could press your butter into a silicone mold and then refrigerate to harden.  Or you can just store it in a jar in the refrigerator. Try to use it up within 2-3 weeks (never a problem in this kitchen)  You could also freeze it for up to 6 months.  

 
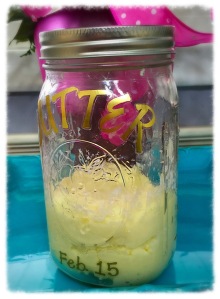
There you have it, an easy peasy cute little jar of fresh butter!   Don’t forget to add your born on date in case you’re forgetful like me.  
Now what are you waiting for……..go get your pioneer woman on! 

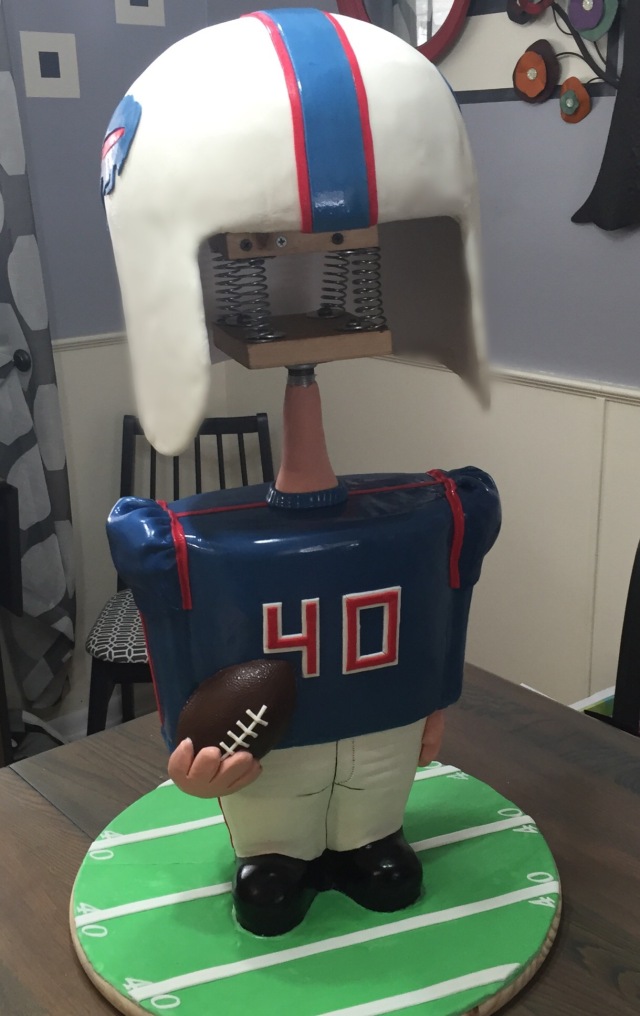
The Bobble Head Cake!Β 

There is nothing more exciting than hearing a customer say, “do whatever you want” in my little cake world. It gives me an ever so slight feeling of power, followed by the ever so slight feeling of terror that I will let them down.

No matter……I always think ‘fine….I will’Β and press on to do the first thing that comes to mind, even if I’m Ascared to do it.

About 5 or 6 years ago, when cake shows were big on tv, I saw an episode where The Cakegirls made a bobble head cake, and I was absolutely blown away! Β So when I decided that I needed to try this some years later, I just figured I could jump online and there would be a diagram and instructions…….Errrrrr……no such luck. Dag gummit! Β I searched and searched and finally accepted that I was going to have to dig into the archives of me lil brain and pull out whatever remained of what I had thought they did.

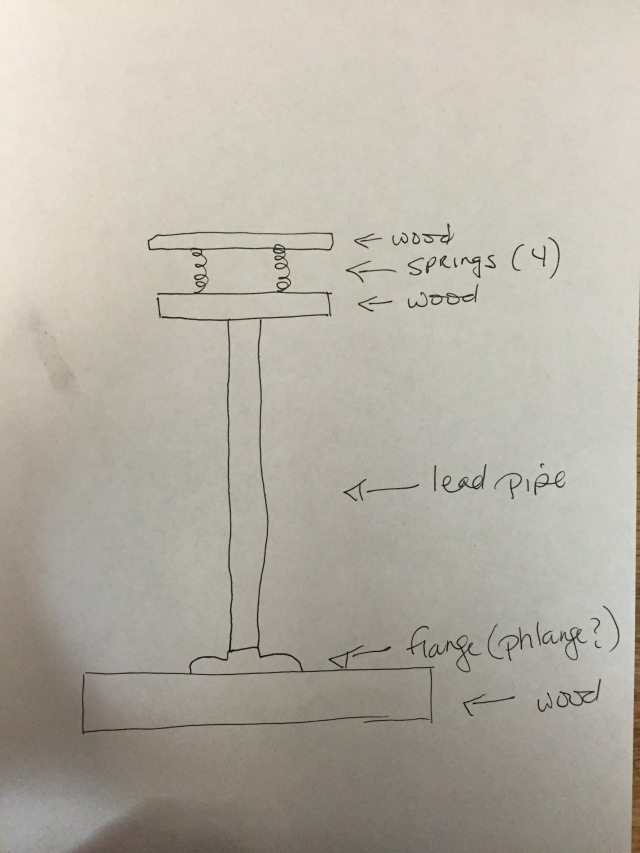
I was already down to crunch time when I decided this was happening, so I scribbled down the following drawing and sent it off to my extremely skilled carpenter husband at work, Β with the following request, “Baby, I think this is what I need, please make it happen…uhhh today?”(heart…heart….smiley….kissie Β face)


His first response was Ofcourse, Β “um….lead pipe in a cake? Lmao”. Ok ok…….so maybe I didn’t fully think that through, and had that coming Β but he knew what I was going for and seemed to agree that this might be the right direction. Β Woot! Unfortunately, and typically he was held at work for the rest of the evening so I was on my own…..wha wha wha. Β Good thing I’m a handy chick….and usually I’m of the opinion that there’s nothing better than cake, except when you need a power tool or two to build the base the cake is going on…..fun stuff!

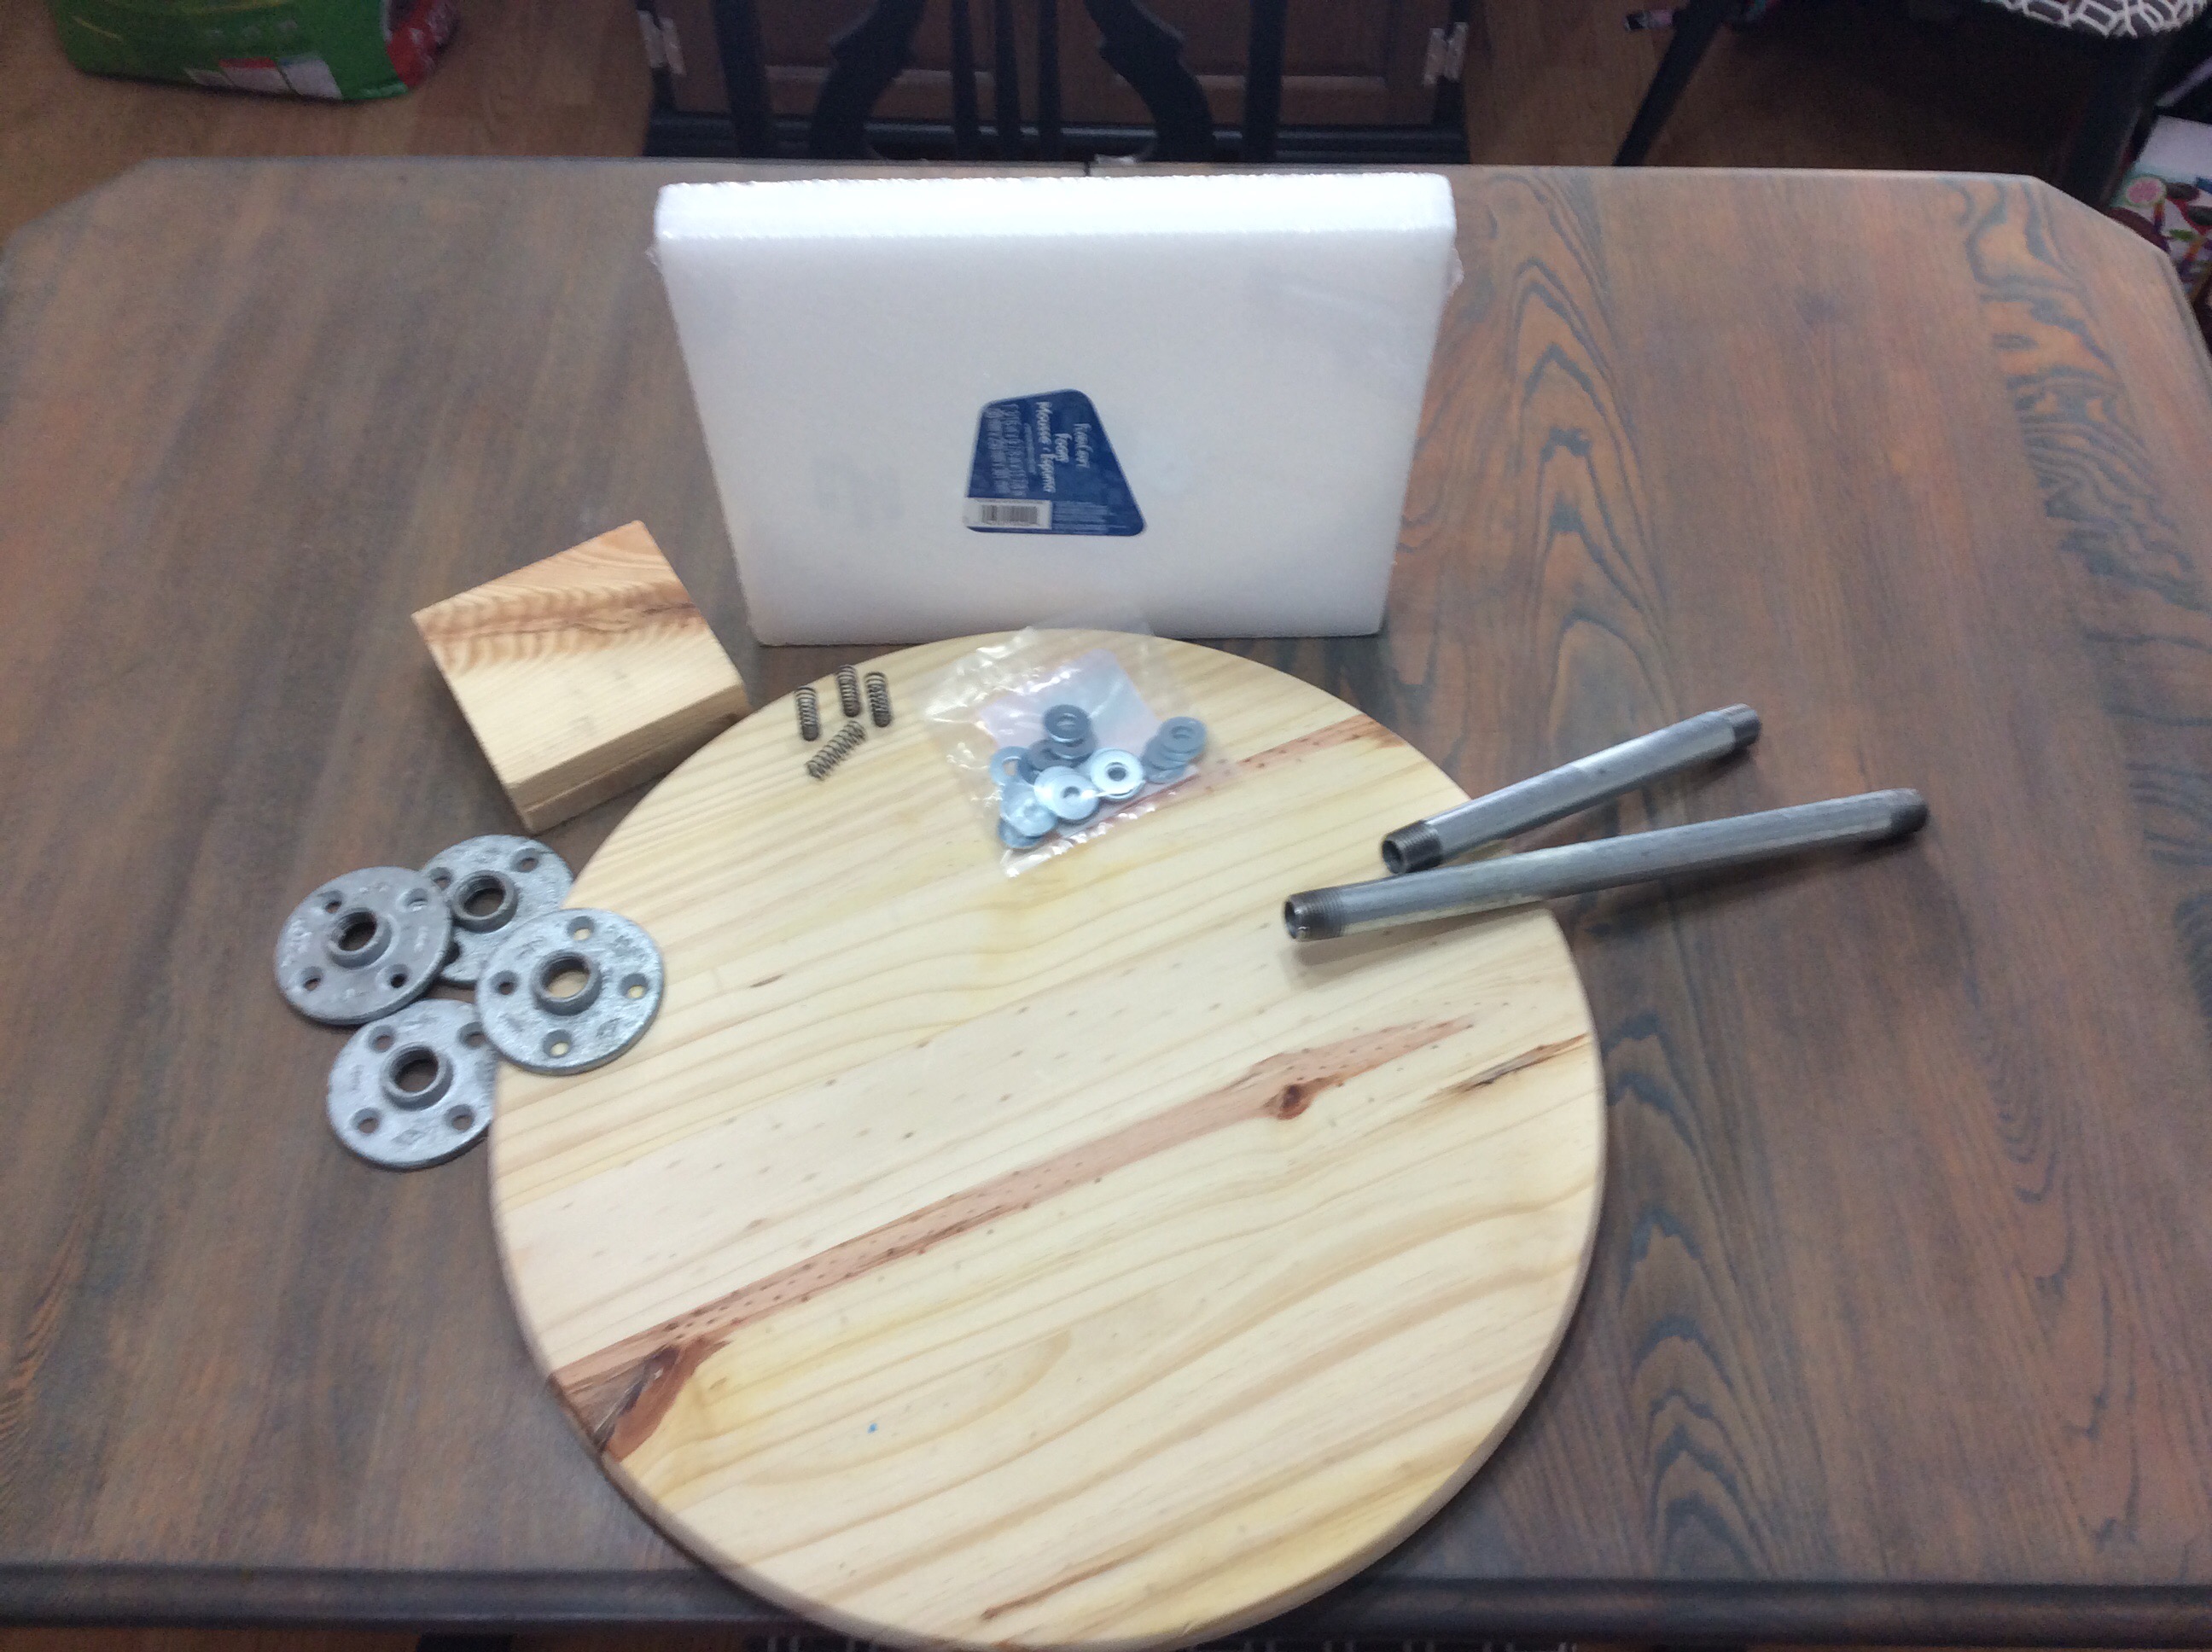
Here’s what you need: Β (well…..most of it is pictured)

cakes by sweetypants

  • A sturdy cake base (I found this precut 18″ pine wood circle at The Home Depot)
  • Large block of craft foam (approx 1 1/2″ thick….the rest depends on what size cake you’re making)
  • 8- Washers & lots of assorted screws
  • 2 wooden blocks (Mine were 4.5″ squares x 3/4″ thick)
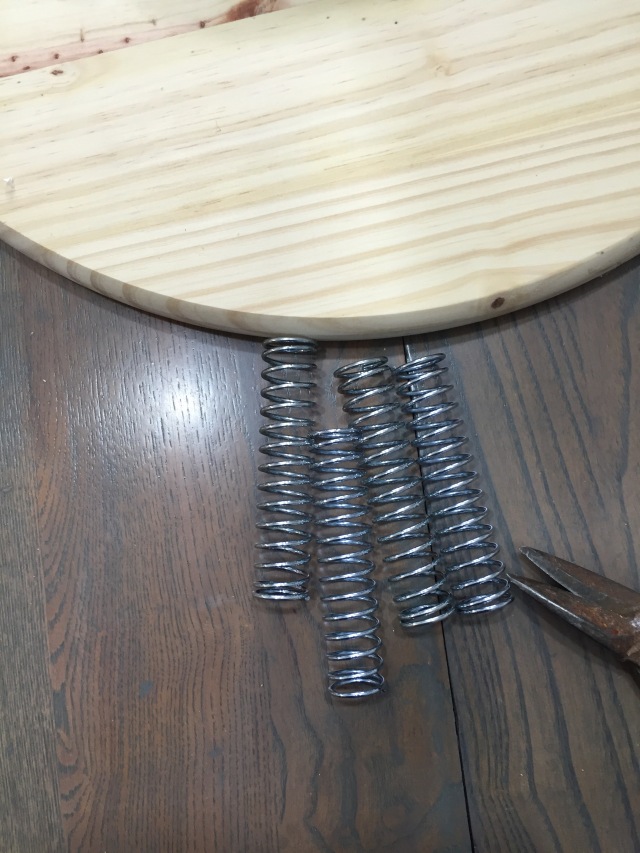
  • 4 heavy dutyΒ compression springs
  • Threaded 1/2″ pipe (not lead…haha……although I did cover mine in Saran Wrap anyways to make myself feel better) length depends on your cake size
  • Heavy duty Velcro
  • 1/2″ flange (I used 4, the hubs assures me I did it wrong and he wouldve built a base that only required 2……either way, this worked just fine)
  • I also used heavy duty poster board for the helmet base, and a piece of 1/4″ thick craft wood,Β cut to size for my cake and stacked , as a base for the “chest” of the bobble head figure,and lastly heavy duty foam core board, also cut to size for my cake plates(not pictured)

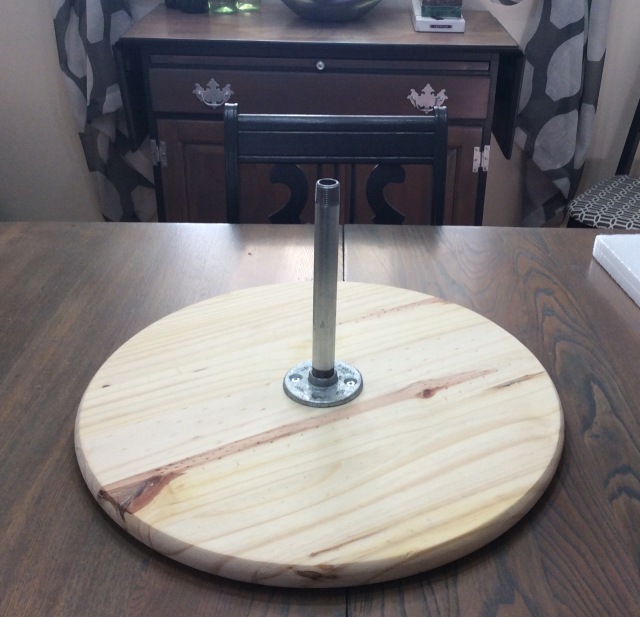
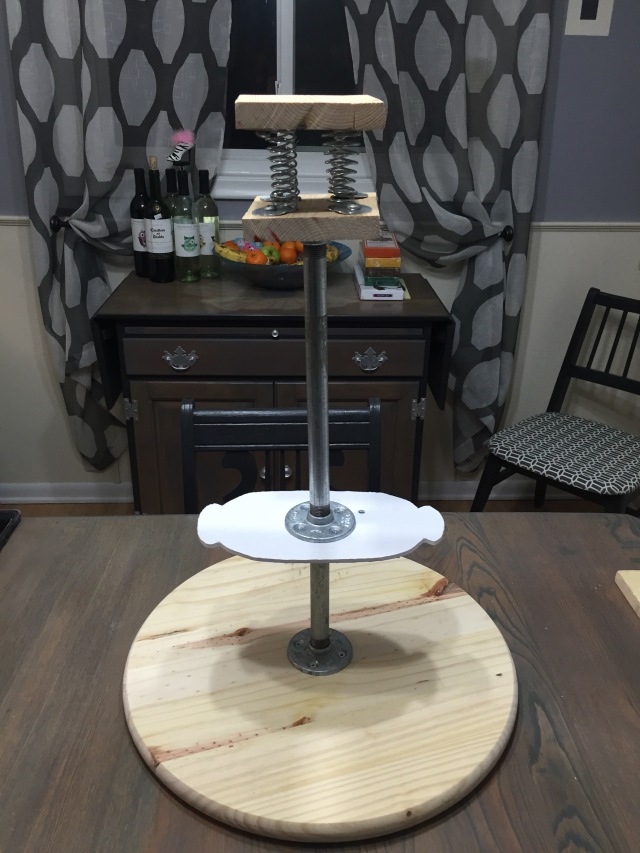
It’s really very simple……start with your circular cake base and attach your first flange, then thread in your shorter pipe for the “legs”


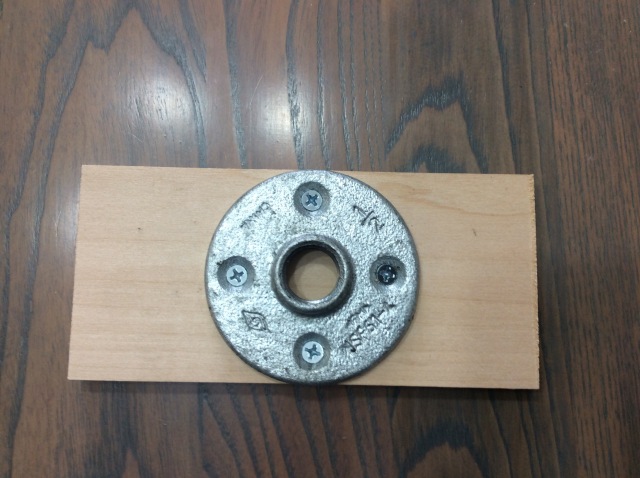
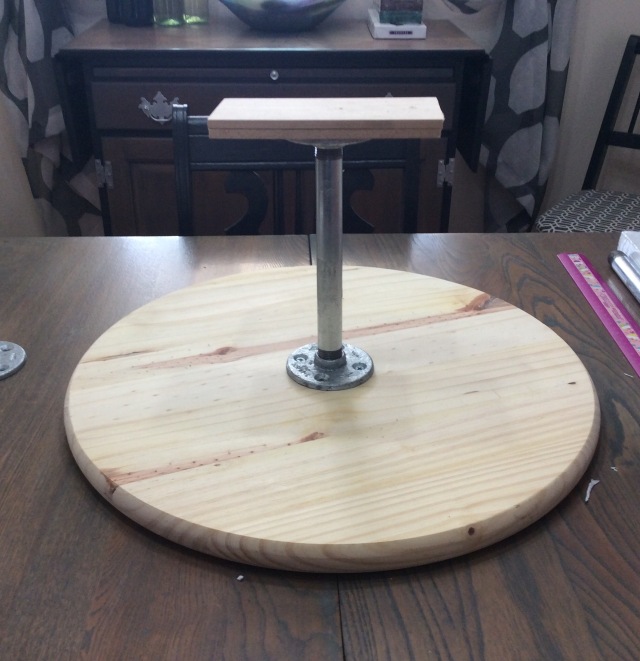
Next, attach your “unnecessary” second flange to your craft wood


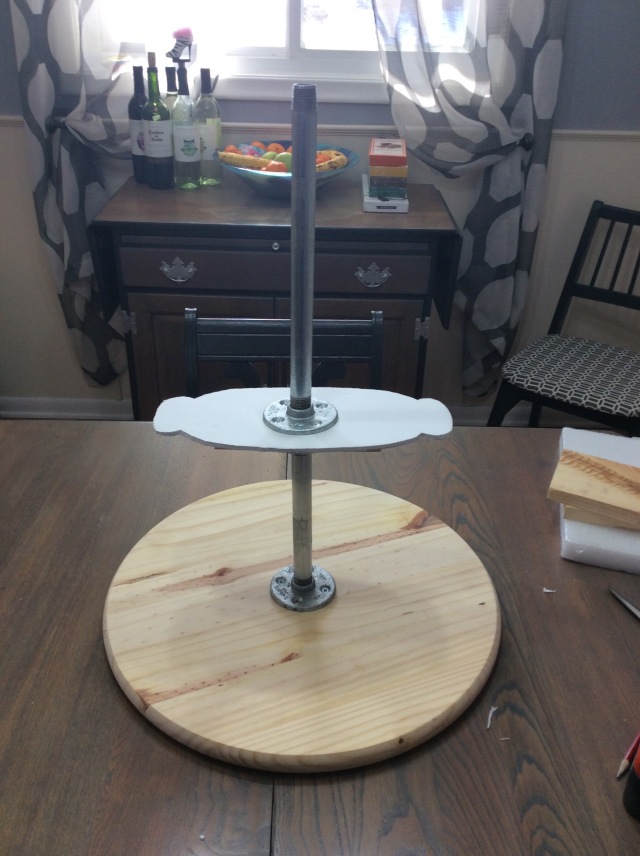
Place your foam core cake board on top and then attach your third “unnecessary” flange and thread in your longer pipe fitting

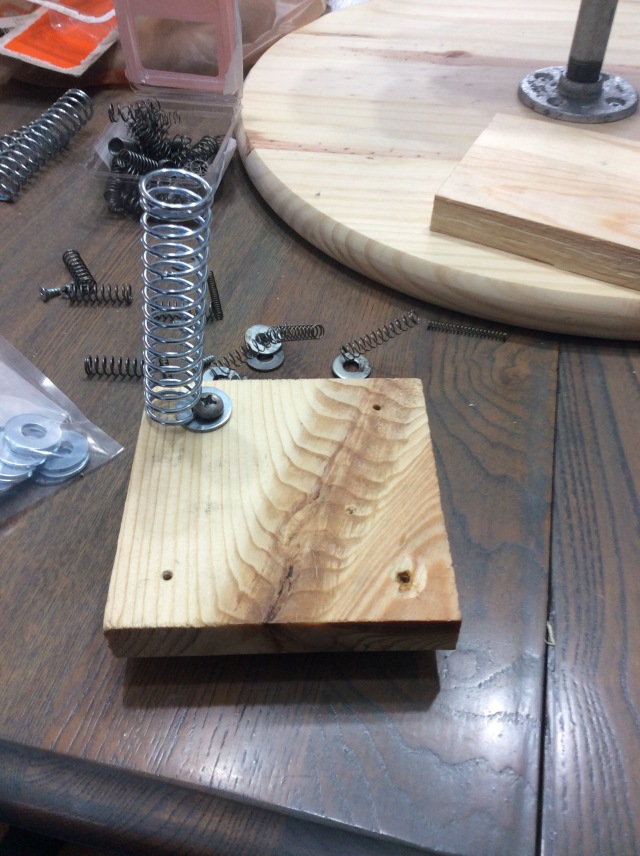
Now it’s time for “The Bobble Mechanism”. Β This part is a little tricky. I tried to do it on my own, with some very whimpy Β springs……it was not happening! Β I upgraded to much thicker, heavy duty springs and began attaching them to the first block.


Β Β 
Once all 4 were attached I realized quickly I couldn’t attach the second block alone. Β My handy hubby and I needed to do it together. Β Unfortunately, I have no pictures of that process because it was all hands on deck! Β One person to pry the top piece back, and the other to in set the screws and washers. Β  After iThey were all in place I attached the 4th and final very very necessary flange to one side.

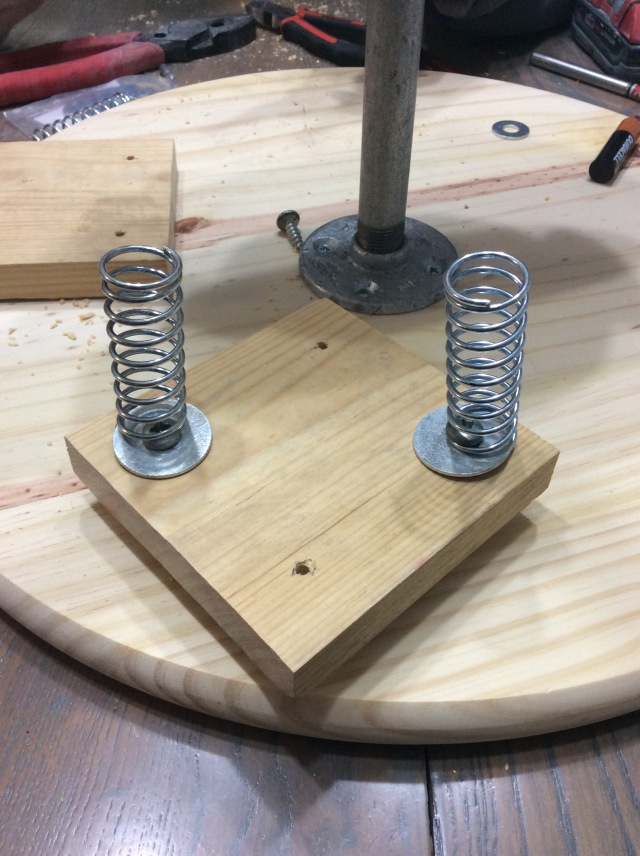
As you’ll see in the next pic, we originally assembled the springs toward the inside of the corners. Β Then we did a test bobble with a heavier plate since it was nearby. Β It seemed to work perfectly.

HOWEVER………Once we did a test bobble with the actual helmet portion of the cake, while awesome to witness, it proved too terrifying for us both so we reassembled the mechanism and positioned the springs directly under each corner.

It’s not so scary when you’re using a plate…..but I promise with a cake on top there were screams all around!


Ahhhhhh…..see, this is much better…..I recommend placing the springs as close to the corners as you can.

The whole process was actually very simple! I Β won’t go through the whole process of making this cake, since this tutorial is for the cake structure, but here are a few side tips I would’ve loved to have had myself beforehand.

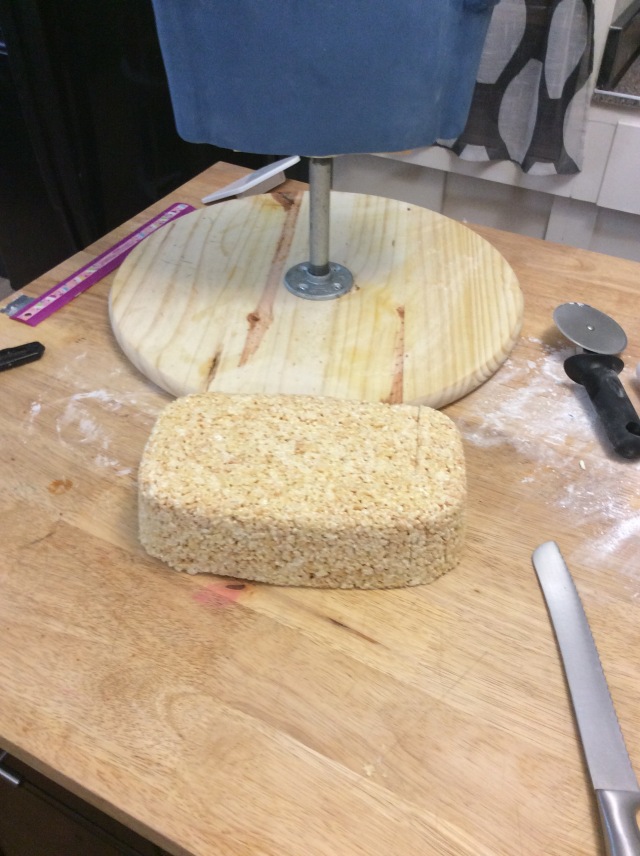
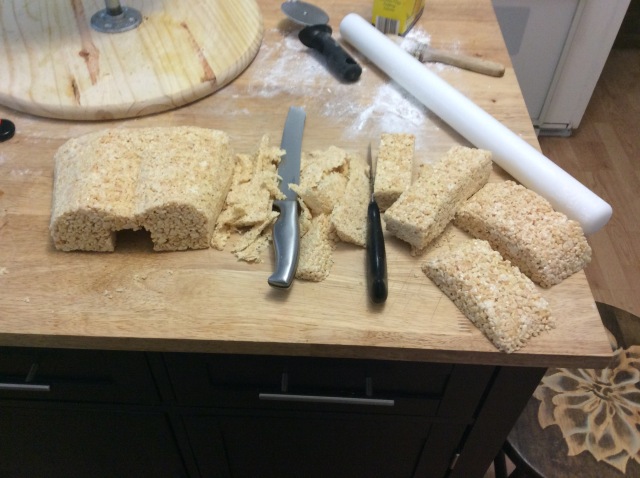
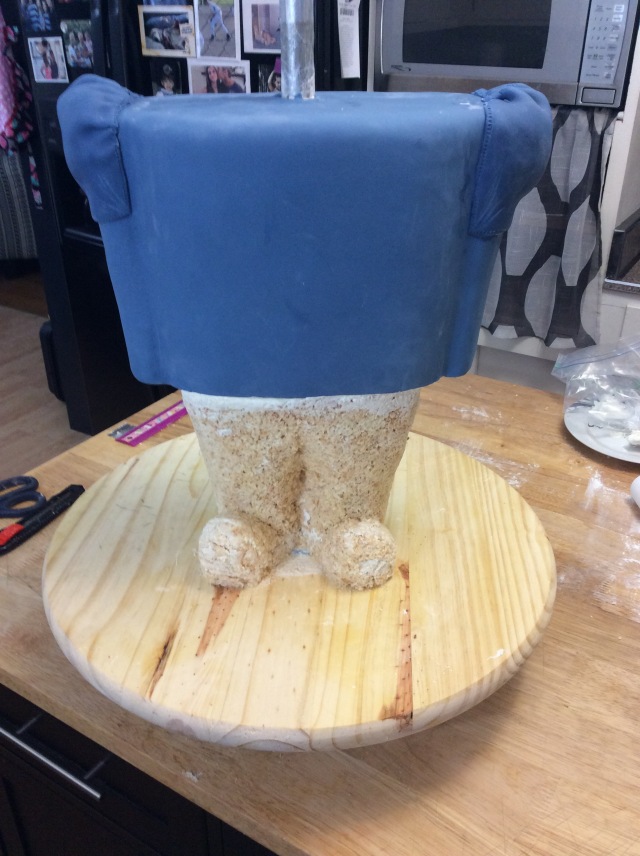
I used rice cereal treats to carve the leg portion of the structure because we didn’t need it to all be cake, but you could easily use cake for them, and add more servings.

Β Β 
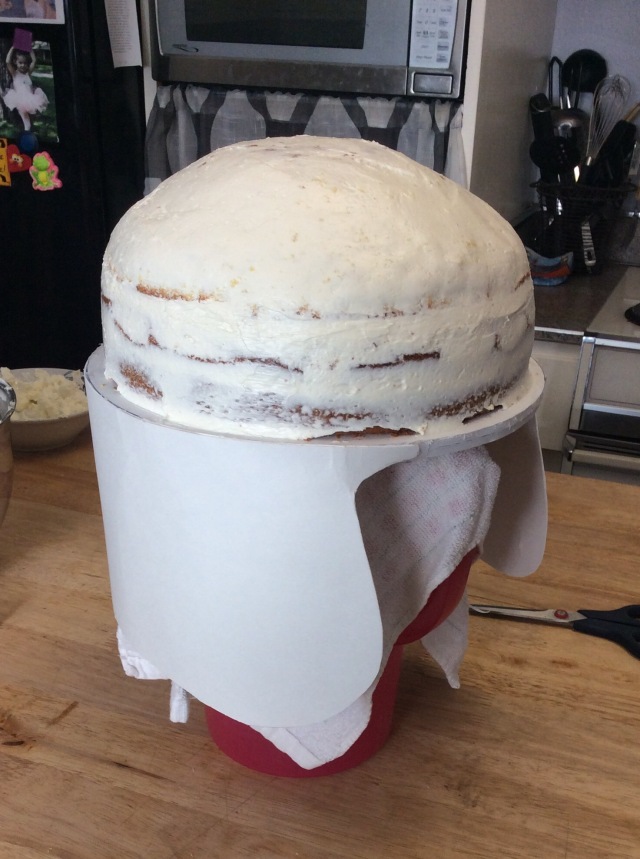
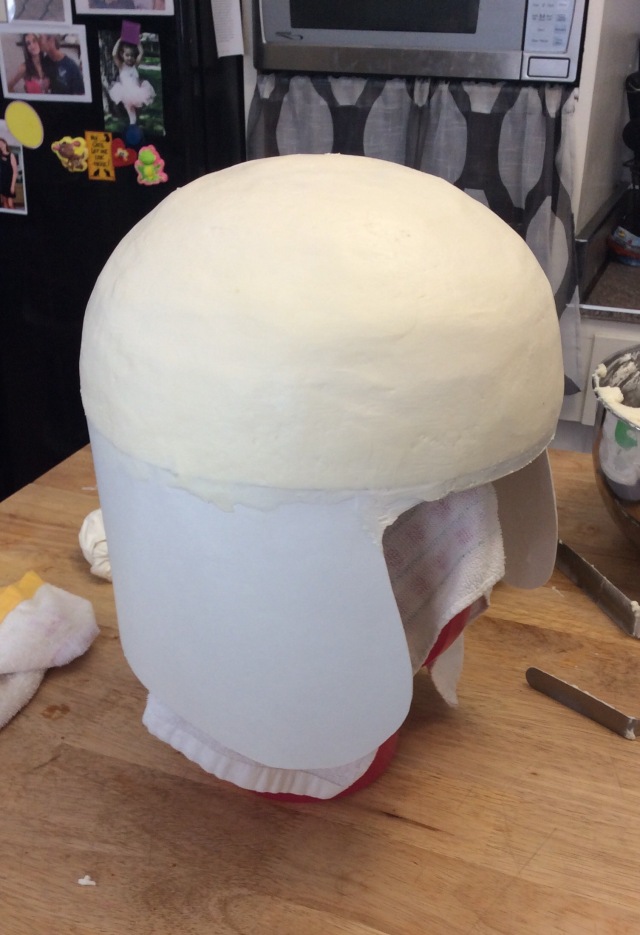
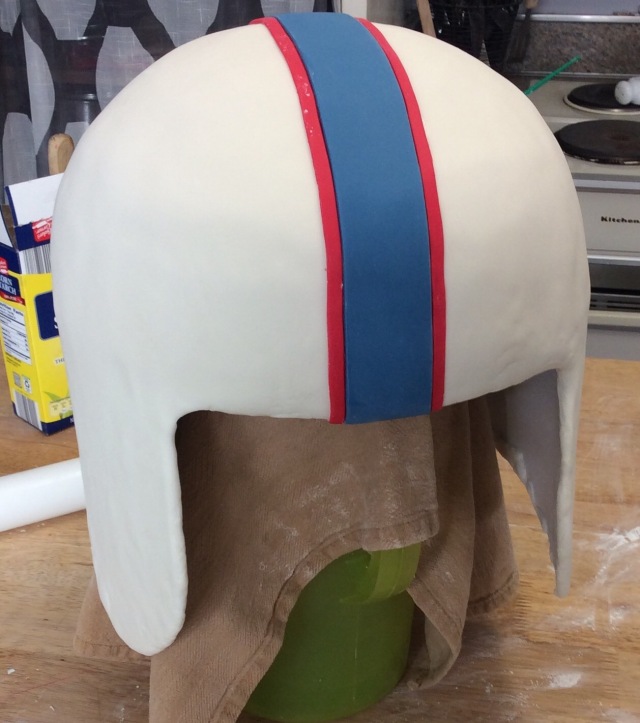
Β Next….. If I had it to do again, I’d wait until I had an extra set of hands to cover the ginormous helmet! As a matter of fact, I’d probably make the head portion a bit smaller.


Because the lower portion of the helmet was poster board, I brushed it with piping gel so that the fondan would have something to adhere to…….while that works great, it also grabs and “glues” the fondant to the surface immediately. Β So the end result was a little more um…jacked up ……than I would’ve liked….. Β Lesson learned, next time just chill and wait until you have an extra set of hands available .


See? I know all you bakers can see those bumps…..ick, Β these are things that keep me up at night. Β Yet, time is not Β on my side here so I press on.

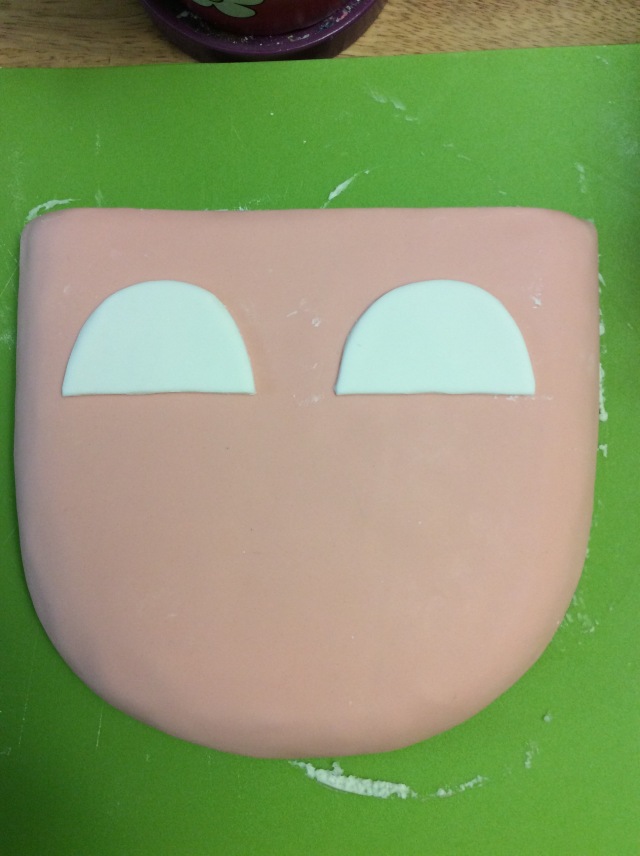
Once the helmet is done you’ll be able to measure your opening and carve the face out of your craft foam.


This is by far one of the more simple steps in the process. Β I used buttercream to lightly frost the foam, and then covered with fondant. You don’t want to add a lot of extra weight. Keep in mind you’re going to be attaching this to the front of your cake and it could potentially throw your bobble off….

Finally, the last thing I’d like to share with you is the actual attachment process. Β If you’re feeling lucky you could totally just set your helmet on top of the bobble mechanism and hope for the best. Β I chose the safer route…..heavy duty Velcro!

Once your helmet is placed though there’s virtually no going back without some serious repercussions so I recommend placing it once without the Velcro and marking the bottom of your cake base so that when you’re ready to attach it for good you know exactly where to set it.

Cakes By Sweetypants, bobble head, cake
And there you have it…..The Bobble Head Cake! I think he turned out just adorable.

Those darn Cakegirls think of everything! I’m just glad my lil brain retained what I had seen!

To watch him bobble visit my YouTube channel, Cakes by Sweetypants. Β Or you can see the video on my Facebook page!


Covering a cake with fondant

So I thought I would do a very quick how to video showing you how easy it can’t (HA! Total typo, but I’ll leave it cuz I think I’m funny!! CAN be to cover a cake with fondant…..yes it takes practice…..sometimes lots of it.  With repetition though it DOES get easier!  

First I have a few pictures to show you from the process

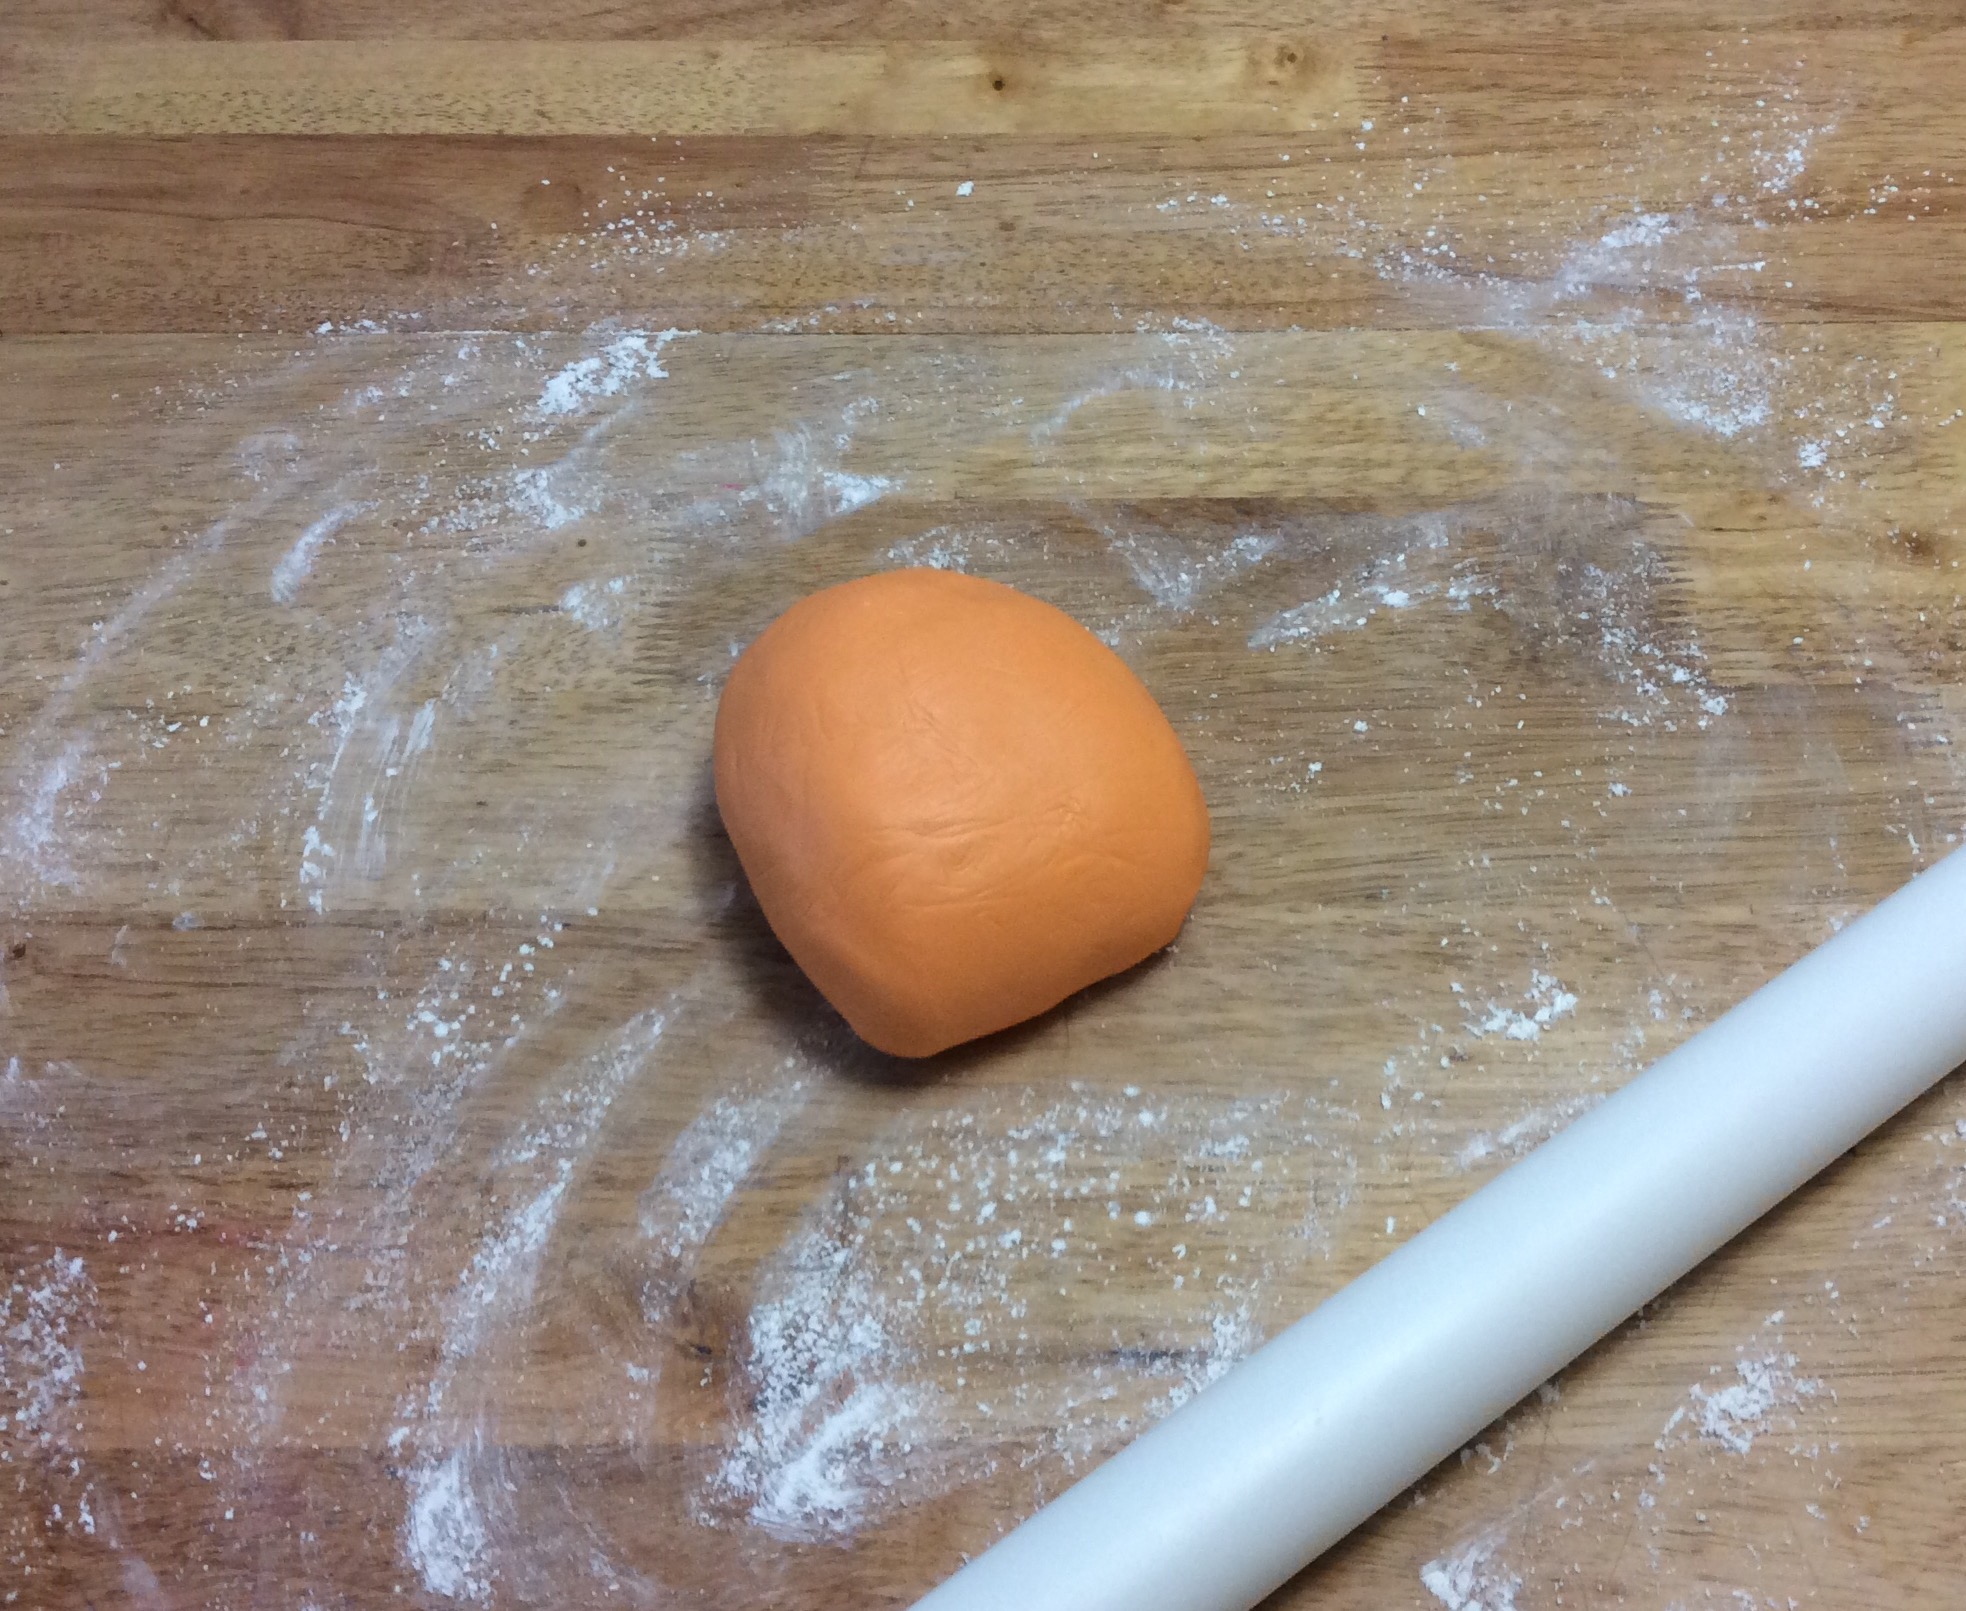
 Start with your freshly kneaded  fondant, and a well dusted counter top. I’ve used corn starch….you can use powdered sugar if you dare…..Its never worked for me 😦 I find that it dries out the fondant that I’m rolling and it cracks easier.  So I stick with the starch!  
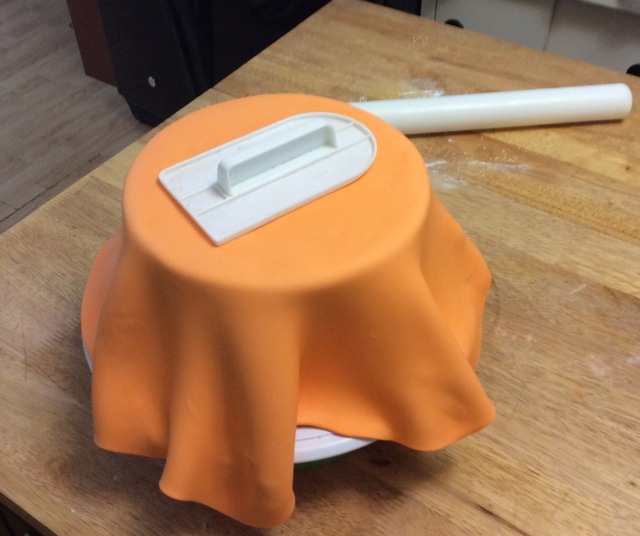
During the rolling process check often that your fondant isn’t sticking to the counter.   This is also when all 10,000 tiny air bubbles will start to present themselves to you….ya know, just to add some spice to your day. Just take a straight pin and give em a tiny poke….then roll them out with your rolling pin πŸ‘πŸ» 
This is the fun part! Once you’ve lifted the dough onto your cake, you can use a fondant smoother to gently push any air bubbles off of the top of your cake.  (You can use your hand also, I find you get all the air out that way, but be sure you don’t dent your cake your frosting)

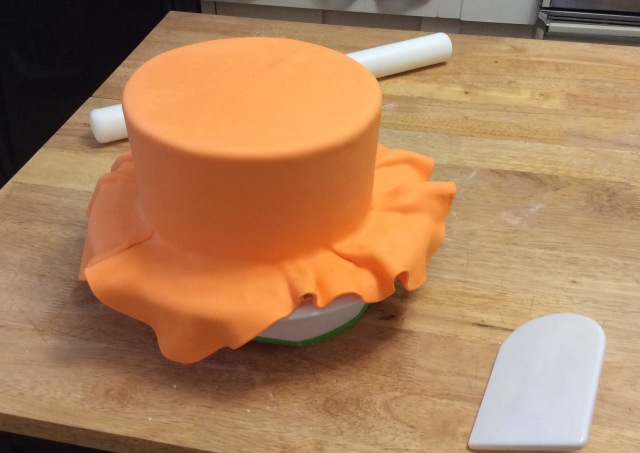
  If you find once the fondant is on that those pesky air bubbles are not all gone, wait until you’ve smoothed your cake and then poke em with your straight pin again and use the fondant smoother to rub them out.  Grrrrrrrrr…..this is something you should just get used to  
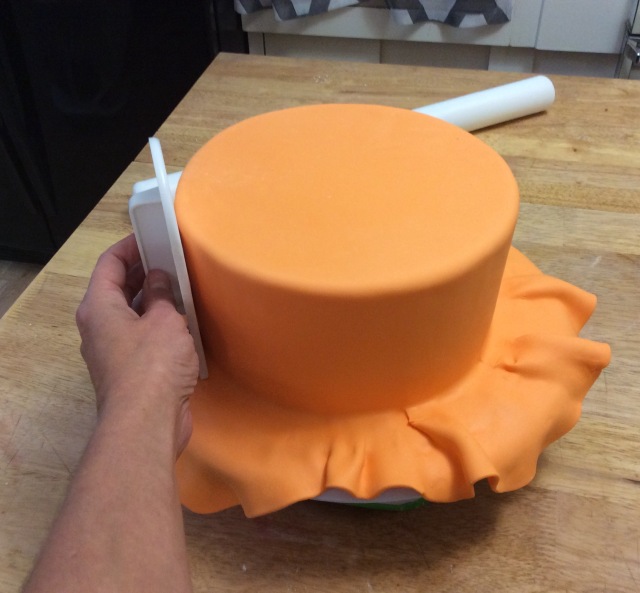
Time to play the fan game!  Start smoothing at your top edge…. As you work your way down, fan out the fondant all the way around, and just keep gently pressing it down. This can take a bit of time if you’re just getting used to fanning and spinning.  Stay with it…..your dough is going to want to bend and crease.  Just be patient and gently fan the creases out while you press it to the cake.   
  Once you’ve made it this far, you’re almost golden!  Now you can give it a quick smooth while pressing the bottom edge to the base of the cake. 

 
 Use a pizza cutter or an exacto knife to carefully trim away the excess.  
And BLAMMO! There you go….. A nice, smooth canvas to work on

 
Below you’ll find a quick video of the entire process…..bare with me, I’m new at this! 

 
You can follow the link below to my YouTube channel to watch the video too. Hopefully soon it will be full of helpful information. Don’t forget to subscribe! (Seriously, I don’t even know if my link works…..I’m sure you will all help me out and let me know though  :/   ) 

How to cover a cake with fondant

Modeling Chocolate 101

If you’re not yet using modeling chocolate, you need to get with the program! Getcha modeling chocolate groove on!

Making and using modeling chocolate is so easy that after my first, uh…successful attempt at it, I was left wondering why I hadn’t been using it for the last few years!

I must admit, I tried to make it a few years back, and it was a horrible mess!  So much so, that I was too afraid to ever try it again.  I know now what mistake I made. (I’ll let you in on that in just a sec) In hind sight, I should’ve just corrected it immediately, tried again and lived happily ever after with my chocolate! Being the creature of habit that I am though, instead I chose to continue to comfortably work with fondant, and convince myself that the hype pertaining to modeling chocolate was just that…..hype.

Well I’m here to tell you, it isn’t just hype at all.  It’s AHHHHmazing! 

The first time I attempted to make it, I believe I used chocolate baking chips from the grocery store.  Yeahhh…..don’t do that!  Those types of chips, while great for cookies and such, contain too much oil for modeling chocolate. Leaving you with a greasy mess!

There are several different brands of melting chocolate out there, you can find them at your local craft store, or candy and cake supply stores.  My personal favorite is Merkens brand.  They’re never dry, and they melt smooth and easily. While you only need two ingredients to make modeling chocolate, it’s still quite a bit more expensive to make than fondant.  I am a money saving, for real penny pincher when it comes to certain things, but I am here to tell you that this is WELL worth the cost!

Not only is modeling chocolate a delicious alternative to fondant, it makes sculpting figurines a breeze. For real! It holds its shape almost immediately, and you can easily & quite literally “wipe out” the seams in your work. Once dry, it will hold its shape forevAH….well, I’ve never tested forever, but a long, long, time.  It also keeps at room temperature for months. As long as you wrap it tightly!

Now, this is still a happily ever after story but……..lets talk about modeling chocolate “cons” if you will, before I tell ya how to make it.

While you can certainly cover a cake with it, the consistency is NOT as stretchy as fondant.  So you run the risk of tearing it while covering.  It is possible however,  to mix your modeling chocolate 50/50 with fondant.  This still gives you the taste of the chocolate, but the pliability of fondant.  Win freaking win!  The only time I completely cover a cake with modeling chocolate, is when I’m working on a nice square cake.  Because the modeling chocolate holds its shape quicker than fondant, it makes getting those clean edges a breeze.  There is a con involved here…..modeling chocolate is HEAVY! Make sure you’re using a sturdy “cake”, and if you’re stacking said cake, be sure to dowel it well so that it doesn’t crush itself 😁.

Finally, one more con….just so you’re prepared.  Just like fondant, (ok worse than fondant) it does NOT like humidity!  Once modeling chocolate has been placed in the fridge, it will sweat it’s rump off after you take it out on a hot day. And I do mean you will have colored water runs all over your hard work! (Sad face). You can make it a little better by boxing your cake up nice and tight before refrigeration, but there is no complete cure for this.  So it’s best to let your figurines, flowers, etc…dry on your countertop and place them once your cake is ready to go.  Or else, avoid using it altogether during humid months.  Wha Wha Wha…..

Ok, I think at this point you probably just want me to tell you how to make it! So here’s what ya need:

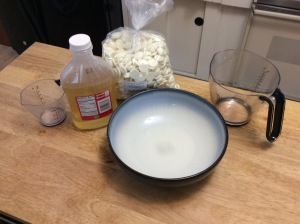
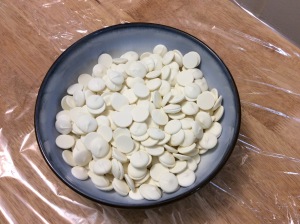
  • 5 cups chocolate candy melts
  • 1 cup light corn syrup

If you’re waiting for more ingredients…..there aren’t any! That’s it! Woot!


Step one: place your candy melts in a large microwave safe bowl.


Microwave on high for one minute…….give it a good stir with a rubber spatula …..usually not much progress at this point.


Place back in the microwave on 50% power at 30 sec intervals, stirring in between, until it’s nice and smooth.  (Should you choose to forgo the recommended 50% power bit you will scortch ya chocolate…don’t say I didn’t warn ya)


Microwave your cup of corn syrup for 40 seconds.  Then mix with your chocolate.


This process doesn’t take long at all!  Once it starts pulling away from the sides of your bowl, you’re done!  Do not over mix!


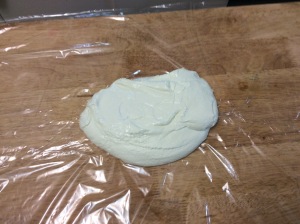
Just turn your mixture out onto Saran Wrap, and wrap tightly. That’s it! It’s best to flatten out your chocolate so that it cools quicker.  As with fondant, try to do this a few days ahead of when you’ll need it.  If you need it right away you can place it in the refrigerator to cool, but this will also make it more difficult to knead later. I like to just leave it on my counter.


Once you’re ready to use it, break off what you need, and start the kneading process. If it’s too hard to work with, you can place it in the microwave for a few seconds to soften it up.  Because chocolate is greasy enough on its own, there is no need to use vegetable shortening on your counter top!  However, it will stick to any surface once it gets soft, so I always dust my counter with trusty old corn starch.

You can color your chocolate just as you would fondant using gel color, either during the kneading process, or you can add the color to the melted chocolate.

As usual….. One last thing!

Probably my most favorite reason for using modeling chocolate……it doesn’t need to be covered while you’re working with it!  Those of you that have worked with fondant know, after you break off a piece to use, the remaining needs to be covered tightly immediately! Otherwise it dries out, and becomes unusable.  Not so with modeling chocolate! This stuff could just sit on your counter all day, exposed to the elements, watching you get your cake on, and it doesn’t get angry at all!

I could go on and on about this stuff, but I’ll stop for now and let you get to work. Hopefully, I’ll get to see some of your modeling chocolate creations!

Have fun & enjoy!

Homemade ButtAHcream Marshmallow Fondant!

I thought I’d start my first official blog post off with something every decorator needs…..fondant!  

Sure, you can buy several different brands of pre made, pre colored fondant and save yourself the headache, and extra step of making it yourself…..BUT it’s a bit more expensive to buy, and there is a huge difference in taste (that’s just my opinion though)! I’m also a firm believer that homemade is from the heart ❀️.   

The following recipe will give your fondant the taste of buttercream.  

Here is what you need!

  • Vegetable shortening ( yuck, I know….but it’s necessary for real)
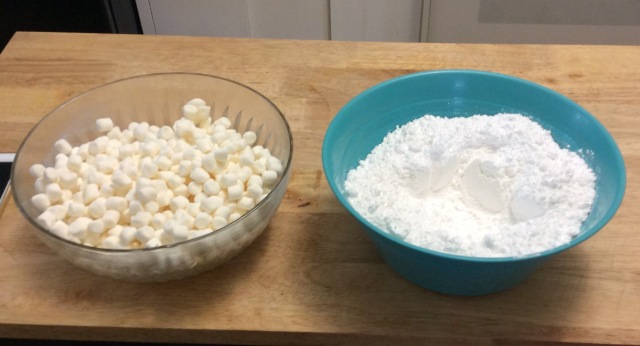
  • 8 cups MINI marshmallows (MINI…trust me on this!)
  • 2 1/2 tsp CLEAR vanilla extract
  • 2 1/2 tsp CLEAR butter extract
  • 1/2 tsp fine salt
  • 3TBS water
  • 2 lbs sifted powdered sugar
  • 2TBS powdered dream whip (IMPORTANT! We are going for taste here!)

*Ofcourse you don’t HAVE to use clear extract…..if you want lil brown colored lumps in yer fondant.

Here we go!

Start off by greasing a large, microwave safe bowl, generously with vegetable shortening……SERIOUSLY…..do not forget this step!  Add your 8 cups of mini marshmallows, water, butter& vanilla extract.  

In a separate large bowl, combine 2lbs powdered sugar with salt and dream whip (store brand works just as well). Mix errr up! Then, create  a well in the middle of your mixture..

  
Place marshmallow mixture in the microwave for 1 minute!

 Meanwhile generously grease a rubber spatula, as well as your countertop for kneading…..AGAIN,,,,,,,, do not skip this step…..I’m just trying to help you out of a sticky mess here people.  

Times up! Give the marshmallow mixture a good stir.  If not completely melted, place back in the micro for 30 sec intervals until melted smooth. (Once melted you can add gel coloring if you need colored fondant, or leave it white and do it later…I’ve added a lil pink to mine) 

  
Pour melted marshmallows into your powdered sugar mixture.  Mix until your little arms can mix no more, and then turn out on to your well GREASED πŸ˜‰ countertop.   Oh ya…… Before you start kneading, ya might wanna grease up those hands…..JS……. 

Here’s what it looks like……

  
A giant sticky mess!

 Knead away people…….this could take anywhere from 5 min to 10. Just depends how temperamental your ingredients are feeling that day.  If it starts to stick to your counter top, just add a little more of the powdered sugar mix underneath it.  I always have some still sticking around in my bowl.  

Here’s the thing……when I taught myself how to do this stuff, I don’t recall reading any tutorials that warned me about the weather.  The threat is real! 

Let’s just say you’re blindly making your fondant when it’s 85 degrees outside.  Don’t care if your air is on or not……chances are you’re gonna have a seriously gooey mess on your hands, literally!  Don’t panic……..or cry…..just slowly incorporate a lil more powdered sugar into your fondant until it reaches a “pliable” almost play-doh like consistency.  

On the other hand…..if it’s the dead of winter (yes…even if your heat is workin over time) your fondant is gonna be purdy upset and get all dry and cracked on ya.  It might even crumble into a million tiny particles…..Try not to have a temper tantrum here 😏, just give your fondant a tiny mist from a water spray bottle…..and I mean tiny! (Too much water will break down your fondant and turn it into a puddle).  

Then just keep on kneading til your fondant is smooth and happy! 

  
That’s it! Once you’ve done it a few times, you’ll be a master!  

Last step: wrap that baby up tight with Saran Wrap so it can set up for a few hours, or overnight.  If it’s cold outside, just give a light coating of vegetable shortening so it doesn’t dry out.

  
If you try and use it too soon, it’ll just be all warm, and soft and gooey on ya.  Nobody wants their cake covered in weepy fondant.  So give yourself the extra time to make it a day or so beforehand! 

OH YA…..ONE MORE THING…….OR TWO!

  1. Once you’re ready to use it, just break off what ya need, color it if you like, re knead and roll out! (If it’s being stubborn and too hard to knead, you can pop it in the micro for a few seconds to soften, but BE CAREFUL you don’t melt it!).  AND finally…..
  2. (This pertains to the weather……again). Before re kneading your fondant, you’ll need to prepare your countertop.  Generally, you will want to use vegetable shortening, so’s it doesn’t stick.  HowevA…. depending on the weather that can make it worse sometimes.  I have been told repeatedly that dusting the counter with powdered sugar works just as well…… To this I disagree! Adding more powdered sugar has only ever made my fondant dry out.  So I cannot recommend it.  I do recommend always, always lightly dusting your counter with corn starch! No matter what the weather, corn starch has never, ever let me down!  Not only does it keep your fondant from sticking to the surface, but it always seems to keep it nice and pliable no matter what weather you are dealing with!  JUST THOUGHT YOU’D WANNA KNOW 😊

 I hope this lil tutorial was helpful! If you have any questions feel free to ask!